

You finish recording a tutorial, voice note, interview, or screen-recording video and hear something you missed at the time: fan noise, traffic, microphone hum, or a hollow room sound. If the speech is still understandable, you may not need to start over. An online tool that can remove background noise can handle many common recording problems automatically. The important part is knowing what to upload, what AI cleanup can realistically improve, and how to judge the result before you replace your original file.
- Step 1: Decide Whether the Recording Is a Good Cleanup Candidate
- Step 2: Use a Simple Browser-Based Cleanup Process
- Upload the Best Available Source
- Let the AI Analyze and Clean the Recording
- Listen to the Cleaned Preview Before Continuing
- Step 3: Match the Problem to a Realistic Expectation
- Step 4: Check More Than the Loudest Sentence
- Step 5: Keep Noise Cleanup Separate From Other Editing Jobs
- Step 6: Make the Next Recording Easier to Clean
- Conclusion
Step 1: Decide Whether the Recording Is a Good Cleanup Candidate
Before using any tool, listen to the noisiest part of the file. Do not ask whether it sounds perfect. Ask whether you can still understand the words beneath the unwanted sound.
Steady fan or AC noise, microphone hiss, electrical hum, traffic, moderate wind, and room echo are reasonable candidates when the voice remains present. A recording with severe clipping, missing words, or a loud sound that completely covers speech is different. Cleanup can reduce unwanted sound, but it cannot reliably recreate information the microphone never captured clearly.
Save the original before you begin. This gives you a reference and lets you return to the source if the processed version sounds unnatural.
For a quick test, choose a section that includes normal speech, a pause, and one obvious noise problem. That gives you more useful information than testing only the cleanest sentence.
Step 2: Use a Simple Browser-Based Cleanup Process
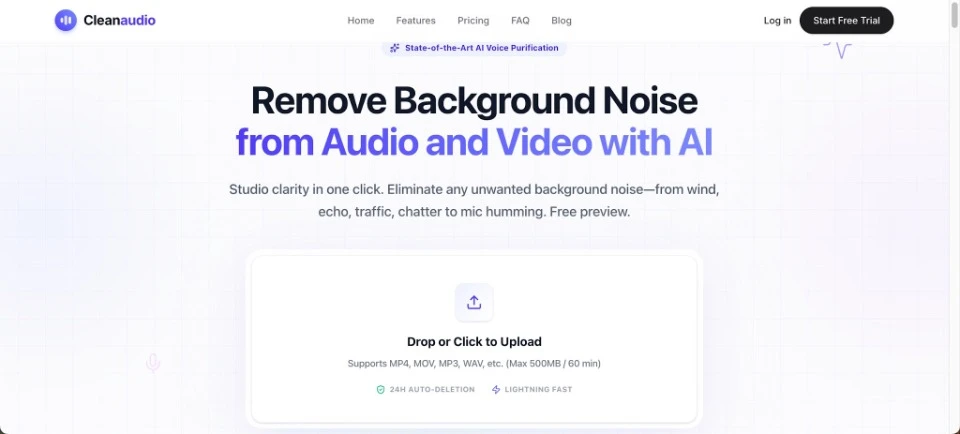
CleanAudio is designed around a short workflow rather than a full multitrack editing project. You can upload audio or video directly in the browser, let the AI process the recording, and listen to a cleaned preview.
Upload the Best Available Source
Start with the original recording whenever possible. CleanAudio currently supports common audio and video formats, including MP3, WAV, MP4, and MOV.
Avoid repeatedly converting or compressing the file before cleanup. Every extra conversion can make it harder to tell whether a problem came from the original recording or from later processing. If you have several copies, choose the one closest to the source.
Let the AI Analyze and Clean the Recording
After upload, the system automatically targets background problems such as wind, fan and AC noise, traffic, static or hum, and room echo or reverb.
You do not need to create a manual noise profile for the basic workflow. That makes the process useful for students, creators, teachers, and casual users who need a practical cleanup step without learning a full audio workstation. It is especially convenient when you only need to fix one recording rather than build a complex editing project.
Listen to the Cleaned Preview Before Continuing
CleanAudio provides a 30-second cleaned preview. Use it as a comparison, not just a demonstration.
Listen at roughly the same playback volume as the original. Check whether speech is easier to understand and whether the voice still sounds natural. If the cleaned version becomes robotic, hollow, or unstable, keep the original and try another approach rather than assuming more removal is always better.
Step 3: Match the Problem to a Realistic Expectation
This AI background noise remover works best when unwanted sound can be reduced without degrading the underlying speech. Use the table below as a quick decision guide.
| Problem | Typical example | What to expect |
| Fan or AC noise | Laptop fan during a tutorial | Reduce the steady layer under speech |
| Static or hum | Electronic noise in a voice recording | Improve clarity where the voice remains intact |
| Traffic | Cars outside a window | Reduce distracting street noise |
| Wind | Outdoor phone or camera recording | Improve understandable sections; strong gusts may be harder |
| Room echo | Voice recorded in a bare room | Reduce hollow or reverberant sound |
| Missing speech | Dropout or fully covered word | Do not expect reliable reconstruction |
This distinction prevents a common mistake: treating “bad audio” as one problem. Noise reduction is useful for noise. It is not the same as repairing lost speech, fixing every edit, or rebuilding a damaged sentence.
Step 4: Check More Than the Loudest Sentence
A single good preview moment does not prove that the whole recording works. Different parts of a file expose different problems.
After processing, listen to a normal sentence, a quiet phrase, a breath or pause, and one of the noisiest sections. Quiet speech can reveal whether the cleanup removed too much of the voice. Pauses can reveal unnatural gating or sudden silence. The loudest noisy section shows whether the main distraction was actually reduced.
If the file contains several speakers, check a short section from each person. Different microphones and rooms can make one voice respond differently from another.
Then play a sample through ordinary earbuds or a phone speaker. You are not testing studio perfection. You are checking whether the recording stays easy to understand where people will actually hear it. For video, watch the same section with the picture on as well. Room echo or hum can feel more distracting beside polished visuals.
Step 5: Keep Noise Cleanup Separate From Other Editing Jobs
It helps to know what happens after cleanup. A cleaner recording may still need trimming, captions, speaker-level adjustments, music, or other editing depending on the project.
Do not expect one noise-removal step to solve all of those jobs. If a presenter is too quiet, that is not the same problem as fan noise. If two people speak over each other, denoising will not automatically separate the conversation. If a sentence contains a mistake, you still need to edit or re-record it.
Keeping each job separate makes troubleshooting easier. First solve the unwanted-background-sound problem. Then move on to the remaining work.
For a tutorial video, that may mean cleaning narration before final editing. For a lecture, it may mean improving speech clarity before adding captions. For a voice note, cleanup may be the only step you need.
Step 6: Make the Next Recording Easier to Clean
AI can help after recording, but a better source file gives you more room to work. A few simple habits make a noticeable difference.
Move closer to the microphone so the voice is stronger than the room. Turn off a nearby fan, television, or appliance when practical. In a reflective space, record near soft furnishings rather than in a large empty room. Outdoors, protect the microphone from direct wind. Make a short test and listen before recording the full lesson, interview, or video.
These actions do not require specialist equipment. They reduce the amount of unwanted sound captured alongside the voice.
Think of AI cleanup as a practical safety net. It is most useful when it has clear speech to preserve, not when it is being asked to rebuild audio that was never recorded properly.
Conclusion
Cleaning background noise with AI is straightforward when you begin with the right expectation. First confirm that the speech is still present, then upload the best source you have and compare the cleaned preview with the original. Judge the result by clarity and naturalness rather than by how silent the background becomes. Keep noise removal separate from unrelated editing tasks, and preserve the original file throughout the process. The next time you record a tutorial, interview, or video, make one short test first; cleaner input will make every later cleanup decision easier.



A little discussion goes a long way.
Ask a question, share your experience, or help someone find an answer.
There is room for your perspective.
No discussions match this view yet.
Your voice belongs here
Keep it useful. Keep it kind.