Apple Notes is a versatile application that allows users to create, share, and sync notes across various Apple devices. One of its most practical features is the ability to scan documents and save them as PDF files. This article provides a comprehensive guide on how to effectively use this feature.
How To Scan Documents To PDF With Apple Notes
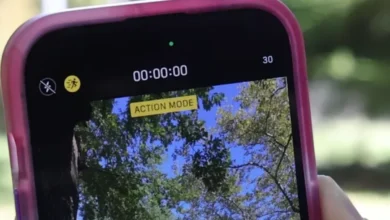
To scan an existing document or create a new one, launch the Notes app on your iPhone or iPad. Navigate to the toolbar and tap the “Camera” icon. From the pop-up menu, select the “Scan Documents” option. Position your document in front of the camera.
The camera will automatically detect the document and show a semi-transparent yellowish box over it. If you’ve enabled the “Auto mode,” the camera will scan the document automatically. Otherwise, you can manually capture the scan by tapping the “Shutter” button. If you have multiple pages to scan, repeat these steps. Once you’re satisfied with the scan, tap “Save.”
Creating High-Quality Document Scans
For high-quality scans, choose a well-lit environment, preferably with soft natural light. You can also improve the lighting conditions by switching on your ceiling lights. Ensure that the flash setting on your device doesn’t fade your document by toggling the lighting icon on the capture screen. For more control over the scanning process, turn off the automatic scanning mode by tapping “Auto” while in capture mode.
Signing a Scanned Document Before Exporting as a PDF
After scanning your Apple notes, you can add a signature before converting them into PDF. Tap the “Share” button, select the “Markup” icon, then press the “Add” icon and choose “Signature.” You can either use a saved signature or create a new one. Adjust the size and position of the signature box as needed, then tap “Done.”
Exporting Scanned Documents as PDFs
To export your scanned documents as PDFs, open the specific note you wish to convert. Tap the share icon at the top right corner of your screen, then press “Send a Copy.” Choose “Print” to trigger the print preview page of your image. Enlarge the preview page into a full screen with a two-finger gesture. Locate the “Share” button at the bottom left side of the screen and tap it. A “PDF Expert” icon will appear. Tap on it to convert your note into a PDF file format. Your newly-converted note will be saved in the “PDF Expert” app as a PDF.
Sharing Apple Notes as PDFs
You can share your converted PDFs by tapping the “Share” button. The menu allows you to invite people to view the note or send each a copy.
Frequently Asked Questions (FAQs)
How can I export my Apple notes to iCloud?
You can export your notes to iCloud by enabling the option in “Settings.” From then on, your notes will automatically enter iCloud and be available on other Apple devices.
Yes, you can share your PDF Apple notes by tapping the “Share” button and choosing the desired sharing method.
Can I edit PDF document after saving it?
Yes, you can edit the PDF document within the PDF Expert app, which offers various editing features including adding graphs, images, annotations, etc.


![how to make your tiktok account private]](https://wikitechlibrary.com/wp-content/uploads/2025/09/how-to-make-your-tiktok-account-private-390x220.webp)